
In the previous article we have launched an EC2 instance, installed all the necessary software on it and created an image of this instance, so now we can clone it and launch more than one instance at once, already configured. Just log in and launch your tests.
Now when we create a new machine from web console we can select our image and use it as a base for our new machine. For this, in the launch menu select “My AMIs” and in the drop-down menu select the image you created previously.

And then you just continue all the same steps for creating a new machine. But this part is about automation and launching everything with just one command, isn’t it?
Terraform
Terraform is an open-source infrastructure as code software tool that provides a consistent CLI workflow to manage hundreds of cloud services. Terraform codifies cloud APIs into declarative configuration files.
That paragraph above was copy-pasted from an official web page of Terraform and honestly, I have nothing to add. The short explanation is pretty clear. If you want to learn more there are more than enough official tutorials from developers of the tool.
Yet, for this article you won’t need them, I will guide through all the steps. First, we need to install Terraform. Here is the instruction for different OSs. If you use Ubuntu as do I, that’s what you have to do:
curl -fsSL https://apt.releases.hashicorp.com/gpg | sudo apt-key add -
sudo apt-add-repository "deb [arch=amd64] https://apt.releases.hashicorp.com $(lsb_release -cs) main"
sudo apt-get update && sudo apt-get install terraform
To check the installation:
terraform --versionYou should receive something like:
Terraform v1.1.8
on linux_amd64
+ provider registry.terraform.io/hashicorp/aws v3.74.3
AWS CLI
Now when we have Terraform installed we need to install AWS CLI. I won’t repeat here all the steps, because very clear intruction is available in AWS documentation, so please, follow it. Now, if you run “aws –version” in your terminal and it gives you the response – congratulations!, you have an AWS CLI installed. Now you have to configure it. To do that just run:
aws configureAnd type in all the necessary information about your account (Access Key and Secret Key ID). More info about configuring your AWS CLI can be found in, yes, documentation.
Now when we have Terraform and AWS CLI installed we can start writing our configuration files. Why did we need AWS CLI? – you will ask. Just to let Terraform know which credentials to use during the creation of infrastructure. Yes, there are other methods to do that, but I am using my personal experience – as I use AWS CLI quite often with my personal AWS account and I had it already installed, I didn’t need to configure Terraform provider at all.
Project itself
First, let’s create a folder for our files
mkdir terraform_aws
cd terraform_aws/
Now we have to initialize Terraform in our working directory, to do that run the following command:
terraform init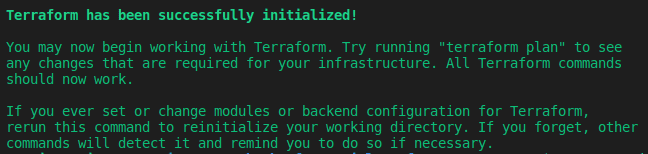
Once we have TF initialized we will start writing our first quite basic configuration file. So you will need to create a file with the name “main.tf” (actually Terraform doesn’t actually care about names, it launches all .tf files, but we, as developers need some kind of order, so let’s give our files reasonable names). The content of the file is below.
First two blocks: “terraform” and “provider” have default values and we can leave it as is. Yet, you can change the “region” property in the “provider” if you are not going to create your EC2 instances in “eu-west-1” (Ireland).
The most interesting one is the “resource“. This is where we set up our machine. Let’s go parameter by parameter:
- count – a reserved variable (meta-argument) in Terraform to use in loops. You can learn more about it here.
- ami – as we are using pre-prepared instance, we will have to specify an ID of our previously created image, can be found in AMIs tab in the AWS web console
- instance_type – the size of our machine
- security_groups – a security group that we set up for our machines, name, not id
- user_data – a script that will be executed on instance’s launch. More about it below
- tags – optional parameter to add tags to our instances, Name is quite useful
- volume_tags – the same as above, just for volumes that are attached to our instances
Now let’s take a closer look to user_data parameter. It will take a file “go_<N>.sh” and will add it as a start-up script to every N machine. In that bash script you can write whatever you want basically. Note: in the current setup a script should be in the same folder as main.tf file, but you can always create a dedicated folder for scripts only and reference it in user_data using the file() function.
“go_<N>.sh” files will have the same structure and will be generated using a template, the only difference between the files will be the targets for every machine – so basically, you will create 1 machine for 1 target. Also, you can target only one prey and focus all your power onto it. For this, in user_data you will need to specify only 1 script and it will be added to all instances.
user_data = "${file("go.sh")}"Generate tests
Now we are getting to the fun part. Here is the script that generates scripts to be distributed between the machines.
It has two templates: for Layer 4 and Layer 7 of MHDDoS, depending on what kind of test you want to perform you will generate different types of scripts. And in this template you can modify the command that launches the test – change duration, rpc, threads etc. Running the “generate.sh” is quite straight-forward:
./generate.sh 4 targets_l4.txt“targets_l4.txt” being a text file with methods and targets for Layer 4 (Layer 7 follows the same structure: <method> <target>)
Also, if you are using VPN you can uncomment the section with Windscribe commands or update it to the provider/service you use (Tor, NordVPN, maybe something else). In parameter $VPN you write down all networks you would like to connect to and there will be a random network assigned to each machine.
Now let’s take a look at a start-up script that is generated by “generate.sh“
Basically, this code will:
- Set a logging file from_terraform_with_love.log, so we will be able to see how did our test go
- Set up a working directory and activate virtual environment
- Start the test for the respective target
- Deactivate virtual environment
- Shut down the machine
Terraform apply
Ok, we have everything ready, we understand what our code does, – time to launch our army of clones. To do that, go to the project folder in which we previously initiated Terraform (if you happen to leave it) and run “terraform apply” (I assume you have already generated all go_N.sh scripts using generate.sh):
cd path/to/terraform_aws/
terraform apply
You will be prompted with the Terraform plan that will show you what resources you are about to create. Type “yes”.
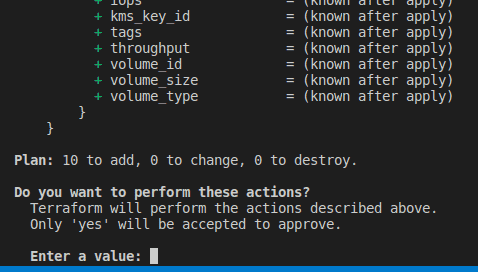
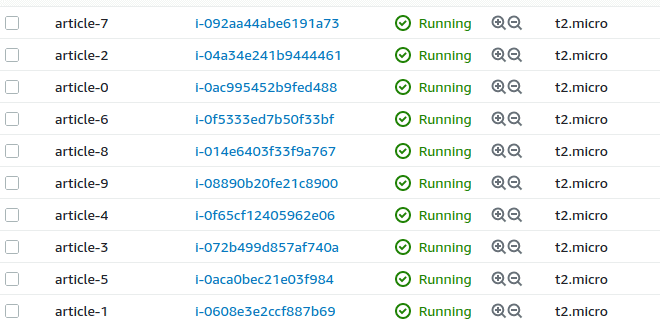
Give it some time and soon you will see a message that all resources are created and if you go to AWS web console you will see the following:
We can leave it alone (if you didn’t comment the command for shutdown) and when all the tests are finished we will see the following picture:
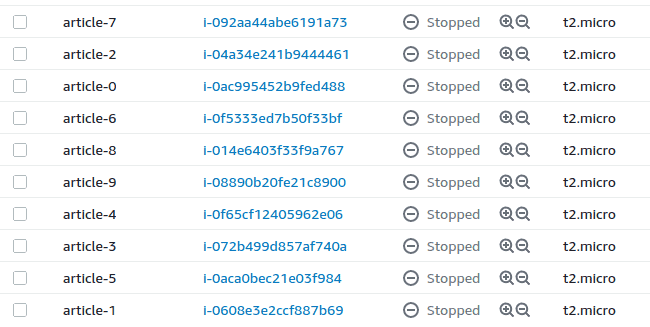
These machines did what they were supposed to do and stopped – no money waste. Basically, that’s it. I would recommend you, before launching 10-20 machines, launch 1-2 without shutdown option to check the log and see how the test is going (another option is to route that log to CloudWatch, but that’s a topic for another tutorial). Also, take into account that you can launch only 32 vCPUs at a time as it was mentioned in the previous article. If you want more, just open a case with AWS Support, they will increase your limit.
If you want to repeat a test using the same targets, you can just start again all instances, if you want to change the target you will have to regenerate start scripts and run “terraform apply” again. Terraform will detect changes in infrastructure and will destroy old machine and create new ones. If you just want to destroy everything you created, run:
terraform destroySo now, just with few commands you can launch an army of terminators and bring down a web resource if it doesn’t have enough protection. Pretty cool, isn’t it? Definitely, a lot of things here can be improved, but this is the foundation that already works – if you want to add more features, you are welcome to use your creativity.
Also, leaving you a link to my repo with the code for this project.
Have fun!
Photo by Blade Lustre on Unsplash